At this point in our AR-15 lower receiver build, we’ve finished putting together the magazine catch, trigger guard, bolt catch, pivot pin, and trigger, and now we’re ready to install the hammer. I have two references for you to check out, if you like, that go along with this article. First is a list of the tools and parts I’m using for this build, and the second is a video reference (the time stamp below will match up with the part of the video where the hammer installation begins).
To begin, you will need the hammer, hammer spring, hammer retaining pin and the 5/32″ punch
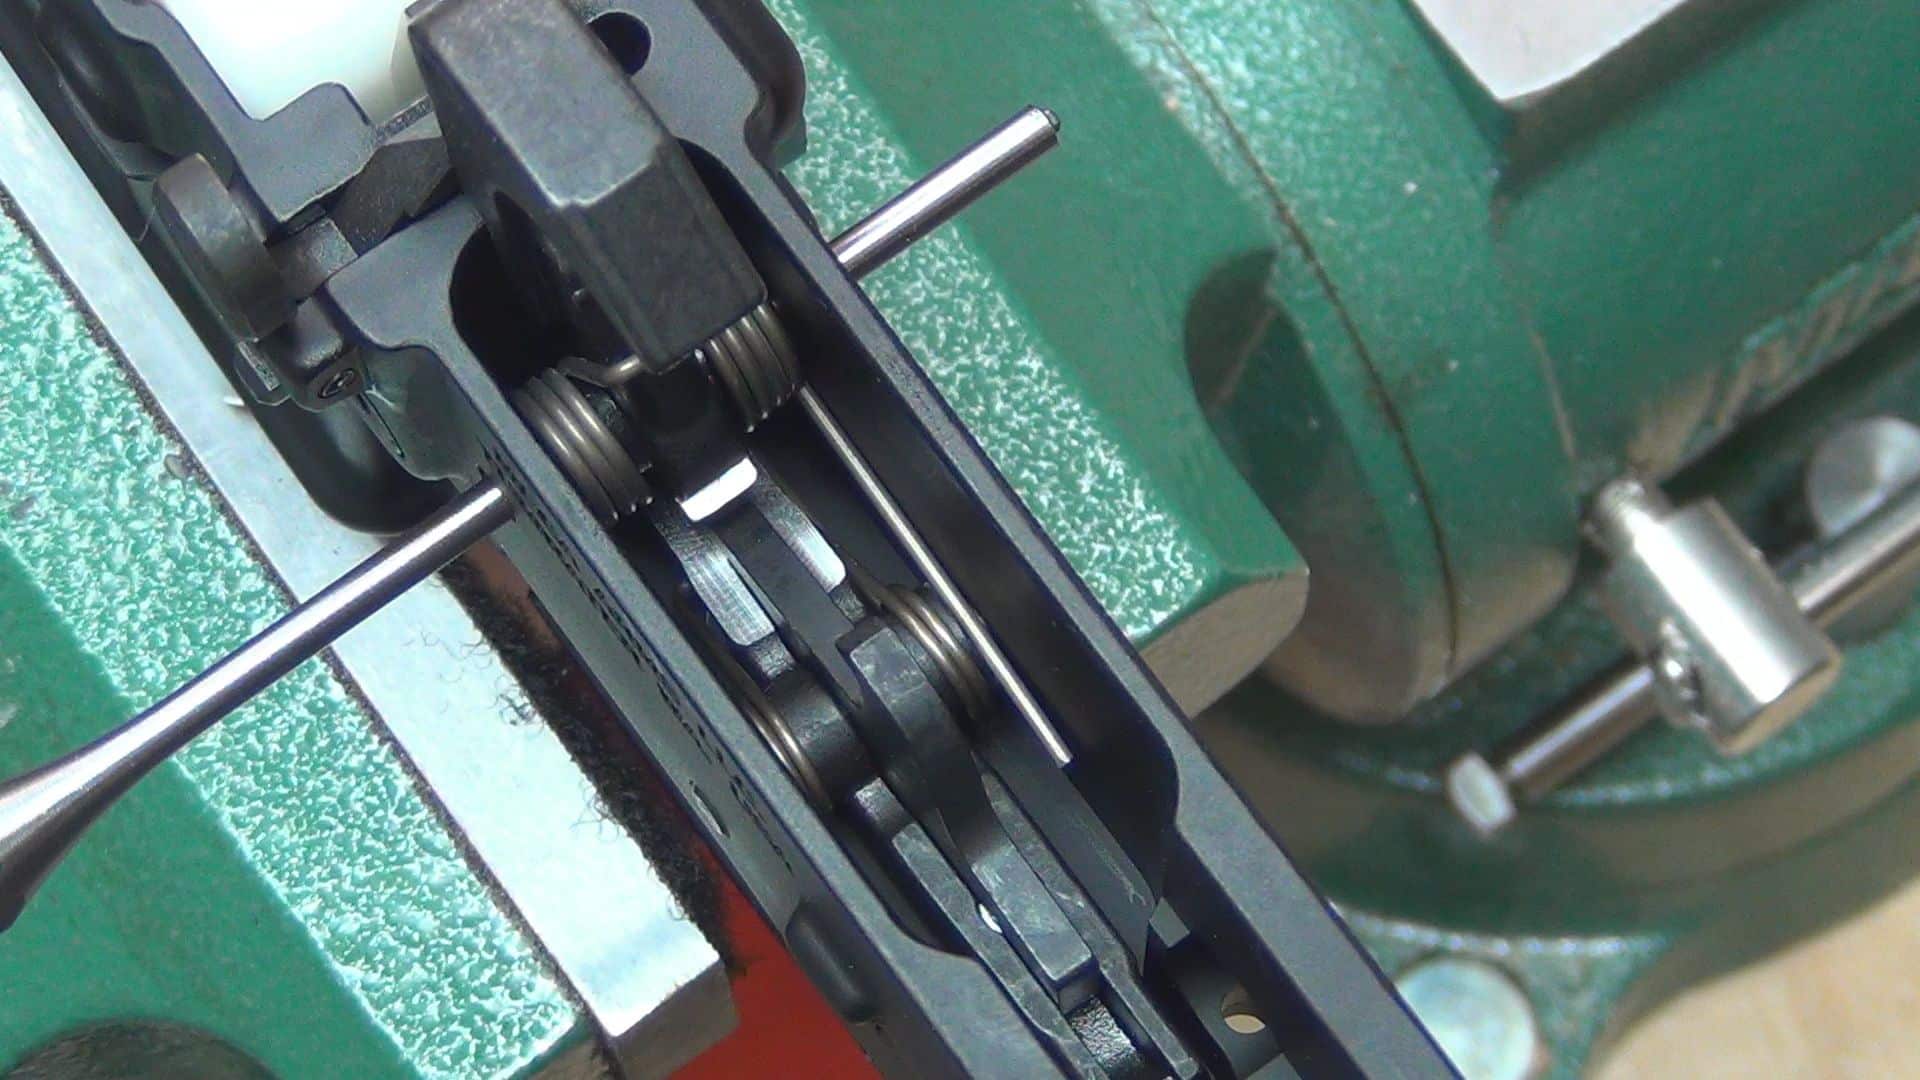
Drop your hammer into place, with each leg of the hammer spring placed into the notches of the trigger retaining pin. You should feel quite a bit of tension as you press downward to line up the holes on the hammer with the holes in the receiver. If you do not, double check to make sure your hammer spring is installed correctly.
While maintaining downward pressure on the hammer, slide the 5/32″ roll pin through the receiver and hammer just like you did previously with the trigger. Again, this will keep everything in place and lined up while you install the hammer retaining pin. This pin will be a little more difficult to install than the trigger retaining pin because it is held in place by the hammer, which is under a lot of spring tension. You may have to use a small brass hammer to tap it into place while trying to keep everything lined up with the roll pin.
Once you have the hammer retaining pin properly installed with both sides of the pin flush with the receiver, you can perform a function check. Again, do not let the hammer fall against the bolt release. Try to keep a hand in front of the bolt release to avoid it getting hit during this function check. Push the hammer down until the disconnector catches it. It should remain cocked until you pull the trigger. Once you pull the trigger, the hammer should fall into your hand, but keep tension on the trigger. While you are still pulling on the trigger, cock the hammer again and then release the trigger. The hammer sear should catch the trigger and the hammer should not fall.
Go ahead and leave the hammer cocked back because you will need it in that position for the next step: installing the safety selector and pistol grip.
Filed Under: AR-15
© Copyright 2020 Thearmsguide · All Rights Reserved.
Affiliate disclosure: As an Amazon Associate, we may earn commissions from qualifying purchases from Amazon.com.