Guide to Building an AR-15 Lower Receiver
Building an AR-15 lower receiver is like putting together a 3D puzzle. Personally, I think that building an AR-15 lower is the most enjoyable and most rewarding part of the AR-15 building process. But, before we get to putting everything together, let’s cover the tools and components we’ll need.
Parts and Tools
Tools
I have compiled a list of tools that I recommend picking up or borrowing that will help make the ar15 lower assembly easier. The following are the tools that I use for my builds:
- Bench vise – This provides you with the ability to keep your hands free.

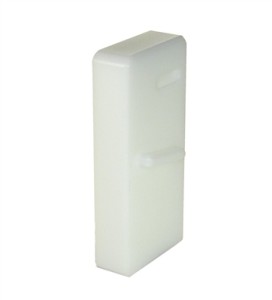
- Ar-15 lower receiver vise block – This goes into your lower receiver’s Magwell and will hold the lower receiver securely in place when in the bench vise.
- Roll pin punches of 3/32″, 1/8″ and 5/32″ size – These are different than other punches because they are made specifically for roll pins. They have a small raised bump on the tip of the punch that fits directly into the roll pin to avoid flattening of the roll pin when driving it into place.
- Roll pin holders – These hold the roll pin when you start tapping the roll pin into place. It’s almost like having an extra hand to help with the build; I highly recommend them.
- Small brass hammer – It is not always best to have a large hammer or mallet. You will want to be accurate when pounding roll pins into place, and the brass is non-marring to the aluminum lower receiver, should you accidentally miss.
- Needle-nosed pliers – These come in handy for helping to hold detents.
- Razor blade – This will be used specifically when installing the pivot pin detent. That reminds me, try and pick up some extra detents because you will more than likely rocket a few into oblivion to never be found again.
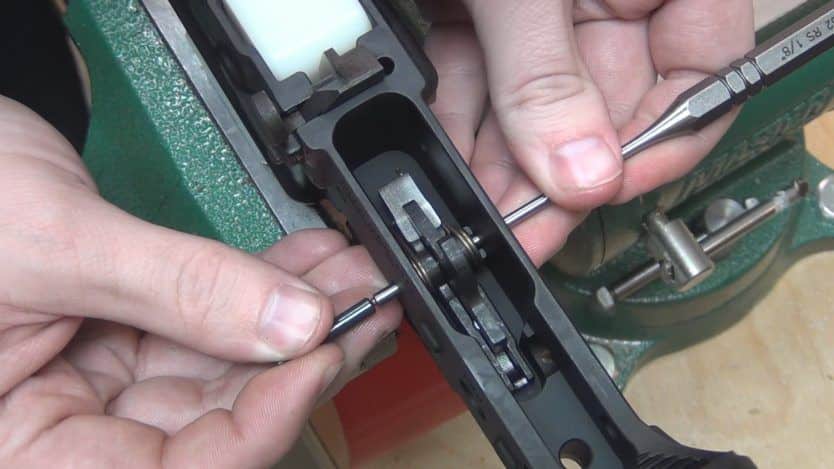
- Roll Pin Pusher (R.P.P) – I discovered this tool by visiting a local gunsmith. It is used for installing the roll pin that holds the trigger guard in place. There are two “dog ear” tabs on the lower receiver where the trigger guard goes. Those can, and will, break if you are not supporting the ears correctly when pounding the roll pin into place. Instead of pounding that roll pin into place, this tool pushes it. For me, this tool alleviated a lot of anxiety of possibly breaking my expensive lower receiver.
- Block of wood – If you choose not to use the R.P.P, you will need a block of wood to help support the “dog ear” tabs when pounding the trigger guard roll pin into place. This is the method I use and demonstrate in the video above.
- Castle nut wrench – This is used to tighten the castle nut on the lower receiver extension.
- Pencil – This comes in handy for using the eraser end of the pencil, since it is rubber. It can be used for installing the magazine catch and buffer retainer.
- Painter’s tape or electrical tape – This will be wrapped around your lower receiver during the installation of the bolt catch assembly to protect the lower receiver from unnecessary scratches.
- Gun oil – This will be used to lubricate difficult roll pins, and various other parts that you will be installing into your AR-15 lower receiver.
80% Lower Receiver Tools
If you do not have a jig kit, you may find that you already have some of the required tools laying around. In general, here is a list of components and tools that you’ll need for the assembling process of your AR-15.
→ The 6 Best AR-15 80% Lower Receiver & Jigs Reviewed
- Set Screw Bolt Catch Pin
- Dowel Pin for Bolt Catch
- Pistol Grip Nut
- Pistol Grip Screw
- Allen Wrench
- AR-15 Jig
- End Mill for fire control pocket
- Drill Bit for the safety selector
- Drill Bit for trigger & hammer pinholes
- Drill Bit for pinholes & trigger hole
All You Need Kit + (5) 80% Lowers by 80 Percent Arms
In my opinion, purchasing an 80% lower with a jig set is the best option as it means you will already have many of the tools required.
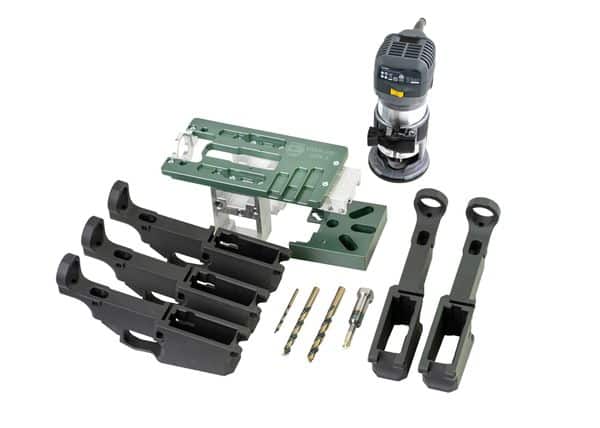
80 Percent Arms sells their own All You Need Kit + (5) 80% Lowers which includes:
- The Easy Jig® Gen 3 Multiplatform
- Five 80% Lowers of your choice
- Freedom Router
- Complete Toolkit (with optional upgrade)
AR-15 Lower Parts
I have found that organization is the key to success when it comes to building a lower receiver. I have built several lowers and haven’t lost a piece yet (knock on wood).
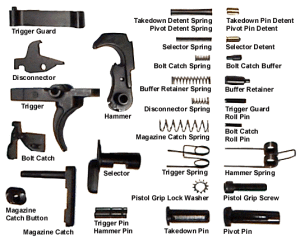
When you are finally ready to put it all together, lay everything out in front of you from the lower parts kit—you may want to look into one of these handy gun cleaning mats that feature standard AR-15 parts, and a receiver extension kit to make sure you have the following items:

Misc. Pieces:
- Bolt catch
- Buffer
- Buffer retainer
- Castle nut
- Disconnector
- Hammer
- Lower receiver end plate
- Lower receiver extension
- Magazine catch
- Magazine catch button
- Pistol grip
- Pistol grip lock washer
- Pistol grip screw
- Safety selector
- Trigger
- Trigger guard
Pins and Detents:
- Bolt catch buffer
- Bolt catch roll pin
- Hammer retaining pin
- Pivot detent
- Pivot pin
- Selector detent
- Takedown detent
- Takedown retaining pin
- Trigger guard roll pin
- Trigger pin
Our Product Review Guides:
Best AR-15 Bolt Carrier Groups (BCGs)
The Best AR-15 Takedown Pins for Your Money
Springs:
- Bolt catch spring
- Buffer spring
- Buffer retainer spring
- Disconnector spring
- Hammer spring
- Magazine catch spring
- Pivot pin detent spring
- Safety selector spring
- Takedown pin detent spring
- Trigger spring
Our Product Review Guides:
Best AR-15 Buffer and Buffer Spring Kits
Best AR-15 Buffers
Now that you have everything together, we’re ready to get started.
For the next installment: How to Build an AR-15 Lower Receiver: Installing Your Magazine Catch


