The Arms Guide
  • Home
  • AR-15
  • Rifles
  • Handguns
  • Reloading Gear
  • Gun Safes
  • About Us
Home » AR-15 » How to Build an AR-15 Lower Receiver: Safety Selector and Pistol Grip

How to Build an AR-15 Lower Receiver: Safety Selector and Pistol Grip

AR-15 Lower Receiver - thearmsguide.com

Last Updated on February 28, 2023, Published on March 5, 2017 by The Arms Guide 1 Comment

We’re now halfway through the steps for building our AR-15 lower receiver. We last left off with installing the hammer, and ready to move on to adding the safety selector and pistol grip. If you wanted to know what tools I’m referencing in this article, check out the tools and components post. The video embedded above is a visual walk-through of the steps covered in this post, but to make it more convenient, I’ve listed the time stamps that reference our specific steps.
AR-15 Lower Receiver - thearmsguide.com
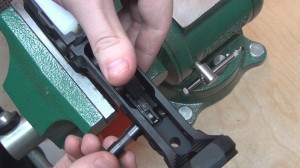
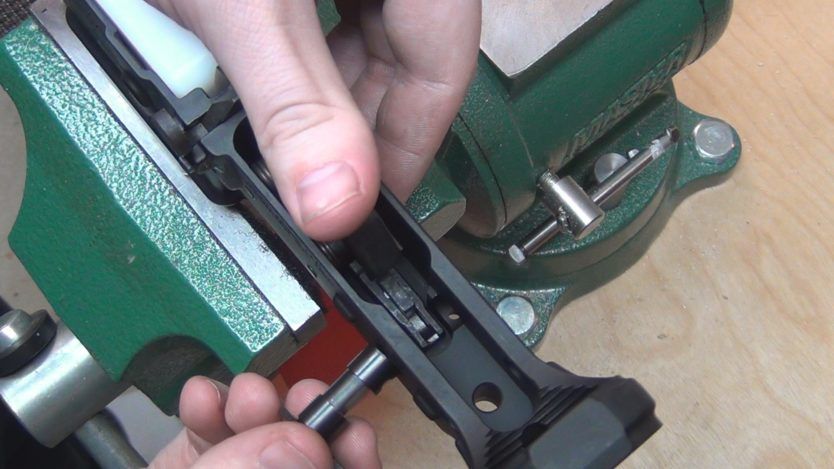
Just slide the safety selector in from the left and you’re selector is installed. Pretty easy, huh?

(15:17) Step 7 – Safety Selector

This step is a real quick one. Take your safety selector and install it from the left side of the lower receiver while facing up as it would be in the fire position. It should rotate freely.

I told you it was a real quick one.

(15:52) Step 8 – Pistol Grip

Remove the lower receiver from the vise block, flip it upside down, and then secure it back onto the vise block. We will be utilizing gravity to our advantage installing the pistol grip upside down. Now, retrieve the safety selector detent, safety selector spring, pistol grip lock washer and pistol grip screw.

Gorillaammunitionwb1
AR-15 Lower Receiver - thearmsguide.com
Notice how the safety selector detent has a pointed tip on one side. You will be dropping this detent into the hole pointed side down.

Let’s test the pistol grip. Grab it. Does it jiggle? Does it wiggle? If it doesn’t, then you have it secured in place properly. However, you still have to check the safety selector for proper function.

Flip the safety selector to safe, and with your hand over the hammer, pull the trigger. You should not be able to move the trigger much, and the hammer should not fall. Now switch the selector to fire, and with your hand over the hammer again, perform the same test. If the hammer is released when you pull the trigger, you are good to go.

We only have two steps left. The last post in the How to Build an AR-15 Lower Receiver series will walk you through installing the receiver extension, rear takedown pin, and, finally, the buttstock, and then we’re on to the AR upper build! Hang in there.

Filed Under: AR-15

Related Posts

  • Best Budget Ar15
    8 Best Budget AR-15 Rifles in 2023
  • Best Ar 15 Cases
    The 8 Best AR-15 Cases Reviewed (Hard and Soft Rifle Cases)
  • Best Ar 15 Lower Parts Kits
    Best AR-15 Lower Parts Kit in 2023

About the Author

Avatar for The Arms Guide

The Arms Guide

About us

Comments

  1. Avatar for The Arms GuideEricKmiecik says

    August 17, 2013 at 6:39 pm

    Very cool series of articles!

Leave a Reply

Your email address will not be published. Required fields are marked *

In Case You Missed It

Best Biometric Gun Safe
Gun Safes

Best Biometric Gun Safe For Pistol & Rifle Storage 2023

August 15, 2022

Best 300 Win Mag Rifles Featured Image
Rifles

7 Best 300 Win Mag Rifles For 2023

June 11, 2022

Best Ar 15 Slings
Handguns

Best 9mm Glock Models Reviewed

June 2, 2022

Best Bedside Gun Safes Featured
Gun Safes

Best Bedside Gun Safes For Quick Access 2023

May 22, 2022

© Copyright 2023 · The Arms Guide · All Rights Reserved.

  • Contact Us
  • Privacy Policy
  • Terms of Use
  • About Us

Affiliate disclosure: As an Amazon Associate, we may earn commissions from qualifying purchases from Amazon.com.