
Easier, Faster Building Experience for AR-15 Upper Receiver
In this article, I will be covering certain tools that will be needed to make your building experience easier and faster. I always find that it is easier to have the right tool for the job, and that is the same case when it comes to building your own AR-15 upper receiver. For this series, I will be walking you through building an AR-15 upper receiver with a free float rail (rather than one with a delta ring). Let’s jump right in.
Recommended Tools

Bench vise: My personal bench vise is a 5″ multi-purpose Master Force. It allows me to turn the vise both in horizontal and vertical positions.
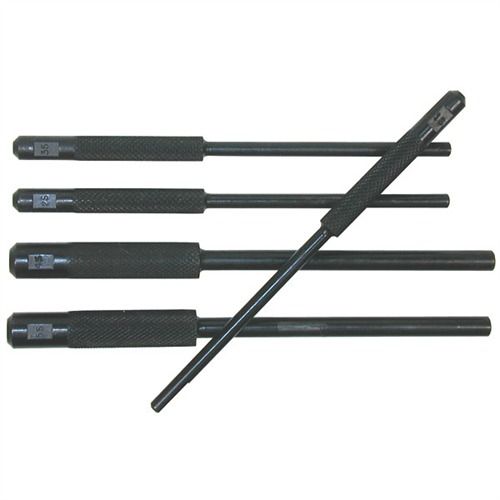
Roll pin holders/starters: These are like a third hand and I highly recommend them based on my personal experience. They hold the roll pin to help you get it started into position. Once you have tapped the roll pin into place enough so it stays on its own, you can switch to a roll pin punch.
Roll pin punches: Roll pin punches are designed specifically for punching roll pins into place. They have a small protrusion on the tip that helps keep the roll pin in place while tapping it into place without damaging it.
Small hammer: It isn’t always size that matters. Using a small hammer, usually in brass, is the best way to go.
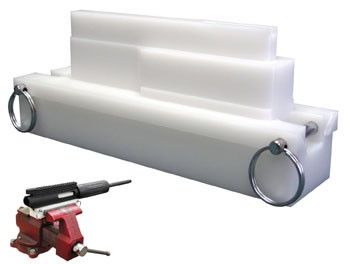
Upper receiver vise block: This is a key component in making sure you can properly torque down your barrel nut. There are many available, but they are not all created equal. I recommend one made out of polymer, has pins to hold the upper in place securely and also supports the upper from the inside. You will also see me using this block, which is a clam shell style. This style works, but not all of them support the inside of the upper receiver, and if you over tighten, you will leave permanent “teeth” marks on your expensive upper receiver.

Torque wrench: You will have to tighten the barrel nut to a specific torque value and this tool will allow you to do that. They come in 3/8″ and 1/2″. I opted for the 1/2″ for my build.
AeroShell 33MS grease: This grease is the topic of many debates. I may expand further on this specific grease one day in a future article, but for now just trust me and make sure to use this grease when it comes time.
Headspace gauges: These are optional. However, please be aware that it is always best to check the headpsace of your bolt and barrel for safety reasons. This is also a topic of great debate, but I absolutely recommend either purchasing the guages to check the headspace yourself, or do what I did and bring it to a gunsmith to have it checked.
AR-15 armorer’s tool: This tool comes in different shapes and sizes, and may not be needed if your free float rail has a atypical barrel nut, like mine did. However, a standard tool will more than likely have the correct sized notches to assist with installing the muzzle device and other components on the rifle.
Now that you are familiar with the tools you will need for building an AR-15 upper receiver, you will be all for next week when I start us off with how to install the forward assist. Stay tuned.